After some trial and error, I figured out how to make my own inflatable bubble tent, and let me tell you, it’s well worth it.
Here is how to make an inflatable bubble tent:
Make an inflatable bubble tent by collecting TPU or PVC sheets, an air blower, and a heat sealer. Cut the sheets into two circles and a tunnel. Use the sealer to join edges, then leave space for a zipper and blower. Attach the zipper, connect the blower, and inflate. Secure with stakes.
Stick around as I share my step-by-step guide on making your very own inflatable sanctuary.
What Is an Inflatable Bubble Tent?
(This post may have affiliate links. Please see my disclosure)
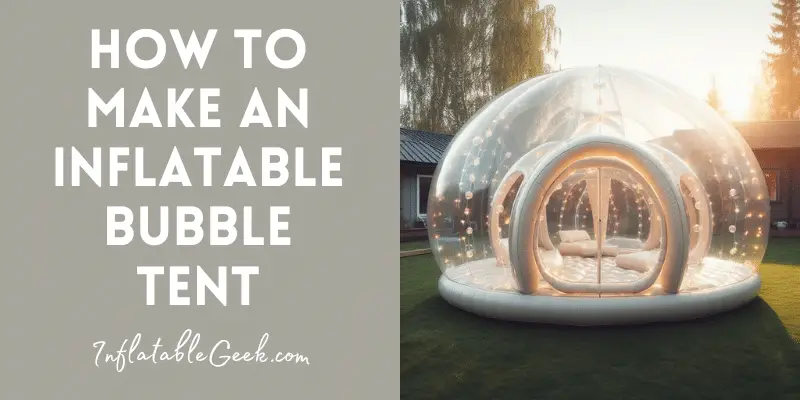
Imagine a transparent dome-like structure, large enough to accommodate a small gathering or an intimate sleepover, all while allowing you to soak in the beauty of nature.
That, in essence, is an inflatable bubble tent.
It’s an innovative, inflatable dwelling that acts as a portable outdoor space, granting you a 360-degree view of your surroundings.
Made usually from high-quality, transparent PVC or TPU material, these tents are resilient against weather changes.
But at the same time, offer the transparency to bring you closer to the great outdoors.
Tools and Materials You’ll Need
Before diving into the making process, it’s crucial to gather all the necessary tools and materials.
This ensures you won’t have to make a mad dash to the hardware store in the middle of your project (like I did).
So, here’s a list of what you’ll need:
- High-Quality PVC or TPU Material – This is the core material for your tent. Make sure to choose a transparent, durable, and weather-resistant type.
- Air Blower – You’ll need this to inflate your tent.
- Sealing Machine – For sealing the edges of your PVC or TPU material together.
- Heavy-Duty Zippers – To create an entrance and exit for your bubble tent.
- Anchoring Stakes – These are to secure your tent to the ground.
- Measuring Tape – For precise measurements while cutting your material.
- Scissors or a Sharp Knife – You’ll need this for cutting your material.
- Patch Kit – For quick fixes and repairs.
- Waterproof Sealant – To make sure your tent is water-resistant.
- Marker or Chalk – For marking cut lines and folds on your material.
- Gloves – To protect your hands during the cutting and sealing process.
- Rope or Straps – For added stability, especially in windy conditions.
- Air Pump with Pressure Gauge – To monitor air pressure while inflating.
How to Make an Inflatable Bubble Tent
Follow these eight steps to make your inflatable bubble tent:
Step 1: Plan and Design Your Tent
The first step is always crucial because it sets the tone for the entire project.
I made the mistake of not properly planning my tent’s dimensions, which led to a less spacious interior than I’d hoped.
So, measure the area where you plan to set up your tent and decide on the dimensions.
Sketch out a rough design, marking where the entrance and other features will go.
Take into account the number of people you expect to accommodate, and make sure to allocate space for ventilation and the air blower.
Step 2: Cut the Material
Once you’ve sketched out your design, it’s time to cut your PVC or TPU material.
When I did this, I failed to account for overlap where the edges would be sealed, which led to gaps in my first prototype.
So, add a few extra inches on each side for overlap.
Use your measuring tape and marker to outline the shape and dimensions on the material, then use a sharp knife or scissors to cut it out. Wear gloves to protect your hands during this step.
Step 3: Seal the Edges
For this part, you’ll need your sealing machine.
Make sure the machine is properly calibrated to avoid uneven or weak seals. If you don’t, you’ll likely end up with fragile seals that eventually need to be patched.
Place your cut pieces edge-to-edge and run them through the sealing machine.
Ensure you create strong, airtight seals because these will be the backbone of your tent’s structure.
Step 4: Attach the Zippers
After your edges are sealed, it’s time to attach the zippers for the entrance.
Cut a hole where the entrance will be, and use the sealing machine to attach heavy-duty zippers.
Make sure to seal the edges of the cut material around the zipper to make it airtight. A tip here: Opt for waterproof or water-resistant zippers to add an extra layer of protection.
Step 5: Install the Air Blower
The air blower will keep your tent inflated.
Cut a hole for the air blower tube and use your sealing machine to attach the blower.
When I did this, I made the mistake of cutting the hole too large, making it hard to seal airtight.
Measure twice, cut once is the advice here. Once attached, the blower should fit snugly, with no room for air to escape.
Step 6: Add Anchoring Points
Your tent will need to be secured to the ground, especially in windy conditions.
Attach anchoring stakes to the base of your tent by creating small loops of material that can be sealed onto the tent’s base.
If you overlook this step, your tent might be sent rolling by a gust of wind.
Step 7: Test for Leaks and Weak Points
Before taking your tent out for its first spin, inflate it and check for leaks or weak points.
I recommend having a patch kit handy for quick fixes.
My first tent had a minor leak that I didn’t notice until I was in the middle of nowhere. A patch kit saved the day.
Step 8: Apply Waterproof Sealant
Lastly, apply a waterproof sealant along the seams and around the zipper areas for extra protection against moisture.
This will ensure that your tent remains dry inside, even in damp conditions.
Watch this video walkthrough of how to DIY a bubble tent:
Troubleshooting Tips Making Your Inflatable Bubble Tent
No project is without its bumps and hurdles, and inflatable bubble tents are no exception.
Having faced my share of challenges while building and using my own, I’ve compiled a list of common issues and solutions to help you keep your tent in tip-top shape.
Problem: Tent Doesn’t Stay Inflated
If you find that your tent isn’t maintaining its shape or deflates rapidly, you likely have a leak.
To identify the leak, inflate the tent and apply soapy water along the seams and around the zippers.
Bubbles will form where there’s a leak. Once you identify the problem area, use your patch kit to seal it up.
Make sure the tent is dry before applying any patches.
I had to deal with this issue, and let me tell you, the patch kit is a lifesaver.
Problem: Air Blower Overheats
An overheating air blower is a sign that it’s working too hard, which is usually due to restricted airflow.
Ensure there are no blockages in the blower or tube and that the blower is positioned in a well-ventilated area.
Overheating can drastically shorten the life of your blower, so nip this issue in the bud as soon as possible.
Problem: Tent Is Unstable
If your tent seems wobbly or gets easily knocked over by wind, it’s probably an anchoring issue.
Make sure you’ve used strong, durable stakes and that they’re driven deep into the ground for better stability.
This was a lesson I learned the hard way, when a strong gust sent my unanchored tent tumbling across the field.
Problem: Condensation Inside the Tent
Condensation can be an issue, especially during cooler nights.
To prevent this, make sure to have proper ventilation in your design.
Adding small, sealable vent holes can improve air circulation without compromising the tent’s structural integrity.
How Much Does It Cost to Build a Bubble Dome?
The cost of building a DIY inflatable bubble dome can vary widely based on the materials you choose, the size of the tent, and any additional features you might want to add.
Generally, a basic model using high-quality PVC or TPU material might cost you around $200 to $500.
This estimate includes the cost of the air blower, sealing machine (which can often be rented), zippers, and other essential materials.
If you decide to upscale your tent with features like LED lighting, temperature control units, or other enhancements, your costs could climb higher.
Keep in mind that while the upfront cost might seem significant, a well-made bubble dome can offer years of use, making it a worthwhile investment.
Is It Worth It to Build Your Own Bubble Tent?
Yes, if you’re going to use a bubble tent 3 or 4 times per year (or more), it is absolutely worth it.
Picture this—you’re inside your bubble tent, surrounded by trees, the sky above you, and maybe even a beach or a lake within your sight.
You’re safely shielded from the elements, bugs, and other unwanted intruders.
But you’re as close to nature as you can get without the discomforts of traditional camping.
These bubble tents have become incredibly popular for romantic getaways, family camping trips, or even unique events like weddings and festivals.
The best part is, they’re portable and relatively easy to set up and take down, offering a unique twist to traditional camping or outdoor lounging.
Plus, you’ll save money from renting or buying a bubble tent by making your own.
How Do You Keep a Bubble Dome Warm?
Keeping your inflatable bubble dome warm, especially during colder months, can be a bit challenging but it’s definitely doable.
A popular method is to use a portable electric heater designed for outdoor use.
Make sure it has safety features like an automatic shut-off in case it tips over.
Insulating the floor with rugs or foam pads can also help retain heat. Some people even use thermal blankets as an added layer on the tent walls.
However, it’s crucial to ensure proper ventilation to prevent condensation and to make sure any heating elements are placed safely to reduce fire risk.
Always read and follow the safety guidelines for any heating equipment you use.
30 Inflatable Bubble Tent Ideas
So, you’ve built your inflatable bubble tent and you’re looking for ways to make it even more awesome?
Here are 30 ideas to elevate your tent game to the next level:
- LED Light Strips – Line the seams with LED lights to create a magical atmosphere.
- Themed Decor – Choose a specific theme like a tropical paradise or a winter wonderland and decorate accordingly.
- Sky Map Ceiling – Draw or paint constellations on the ceiling for a simulated stargazing experience.
- Projector Screen – Set up an internal white sheet to use as a projector screen for outdoor movie nights.
- Ventilation Fans – Small battery-operated fans can keep air circulating and reduce condensation.
- Solar-Powered Chargers – Integrate solar panels into your design to charge devices.
- Temperature Control – Add a portable heater or cooler to regulate the internal temperature.
- Hanging Planters – Install clear pockets or loops for small hanging plants.
- Portable Kitchenette – A small portable grill and cooler can transform your tent into a foodie paradise.
- Children’s Play Area – Add toys and soft flooring for a unique play space for kids.
- Mosquito Nets – Attach fine mesh to the entrance and vent holes to keep bugs at bay.
- Mood Lighting – Use remote-controlled LED bulbs to change the lighting according to your mood.
- Inflatable Furniture – Add inflatable chairs or loungers for extra comfort.
- Storage Pockets – Sew in some pockets or loops for storing small items like keys or flashlights.
- Floor Cushions – Add plush floor cushions for comfy seating or sleeping.
- Foot Mat – Place a washable foot mat at the entrance to keep the interior clean.
- Outdoor Dining Experience– Include a small foldable table and chairs, creating a perfect space for alfresco dining without the bugs and wind.
- Two-Room Partition – Use a zipper or Velcro partition to divide the tent into separate rooms.
- Board Game Corner – Create a dedicated space for board games and puzzles.
- Pet-Friendly Features – Add a small pet bed or feeding station for your furry friends.
- Interchangeable Panels – Use Velcro to make interchangeable decorative panels.
- Internal Dividers – Use mesh dividers to separate different areas or activities.
- Retractable Roof – Design a section that can be opened for direct stargazing.
- Window Blinds – Attach roll-up or fold-down blinds for moments when you need privacy.
- Smoke Detector – For safety, especially if you’re cooking inside.
- Fire Extinguisher Holder – Install a small holder for a portable fire extinguisher.
- Art Space – Hang some lightweight, weatherproof artwork.
- Built-in Speakers – Embed small waterproof speakers for an integrated sound system.
- Book Nook – Include a small bookshelf or storage for your favorite reads.
- Inflatable Jacuzzi – If you’ve gone really big with your tent, why not add a small inflatable jacuzzi?
Final Thoughts: How to Make an Inflatable Bubble Tent
When it comes to inflatable bubble tents, if you build it, the fun will come.
For more exciting DIY projects and inflatable hacks, you won’t want to miss what’s bubbling over on the rest of my site.
Read This Next: